Have ever experienced a situation to send many emails? Most of the people who are reading this have experienced. But if you want to send bulk emails, you can’t customise them.
Why Send Personalized Emails
The basic form of personalizing emails is writing the recipients’ names. If you don’t write the recipients’ names, the email looks unprofessional. For example, writing “Hello Jack” is more professional than “Hello“. Nobody is going to read an email if you write it without mentioning their name. The mail looks like it is automated.
If you are sending emails with the person’s name, the chances of opening your mail increase. Let’s assume a real-life example. If you are working, customising emails is a game-changer. Suppose you want to send an email to a team and you send the email to all the members of that team.
If you customise the email, the chances of opening and reading your mail increase. So, the chances of getting replies also increase.
Problems with sending Personalized Emails
You can’t write a recipient’s name in the email directly because others reading it can’t understand the mail. If you write “Hello Jack“, other recipients think that the mail is not for them. It looks unprofessional. So, the customisation for each person is important.
But it takes a long time to send a personalised email to each person. And it is impractical and not useful in our day-to-day life. We need to send personalised emails and also not waste our time sending them.
So, this is a free process of sending personalised bulk emails easily. Here is a guide to help you do it.

Send Personalized Bulk Emails
We are going to use Google’s Mail Merge feature to do this. Here are the steps to follow.
Get Mail Merge for Free
- Go to Mail Merge and click on “Make a copy”
- You will be redirected to Google Sheets
- Click on “Make a copy”
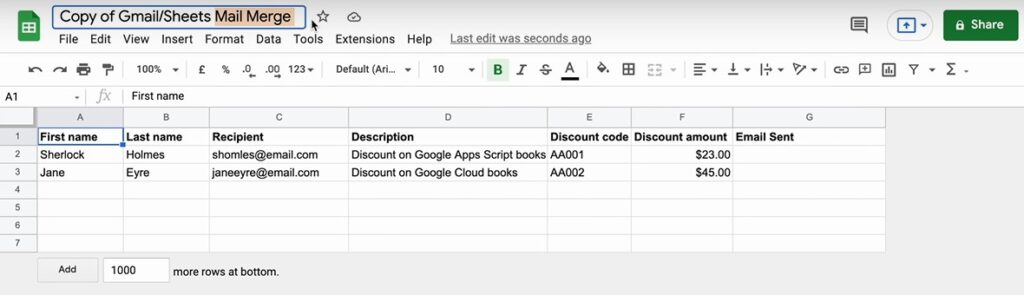
- This is the interface you will get. Here, you can customise the Email you want to send.

Customisation
You have to customise the columns of Mail Merge Google Sheet to send customised emails. You also rename this Google Sheet. The columns of this sheet are the various customisation options for the mail you want to write. Let’s learn more about these properties.
Properties
The columns are called properties (here). Let’s say we want to write an email to Jack and John. To do this, you can create a column named “Name”. You have to write their names in this column corresponding to their email address in the “Recipient” column.
You can do this not only for names but also with customer ID, client ID, employee ID, etc…
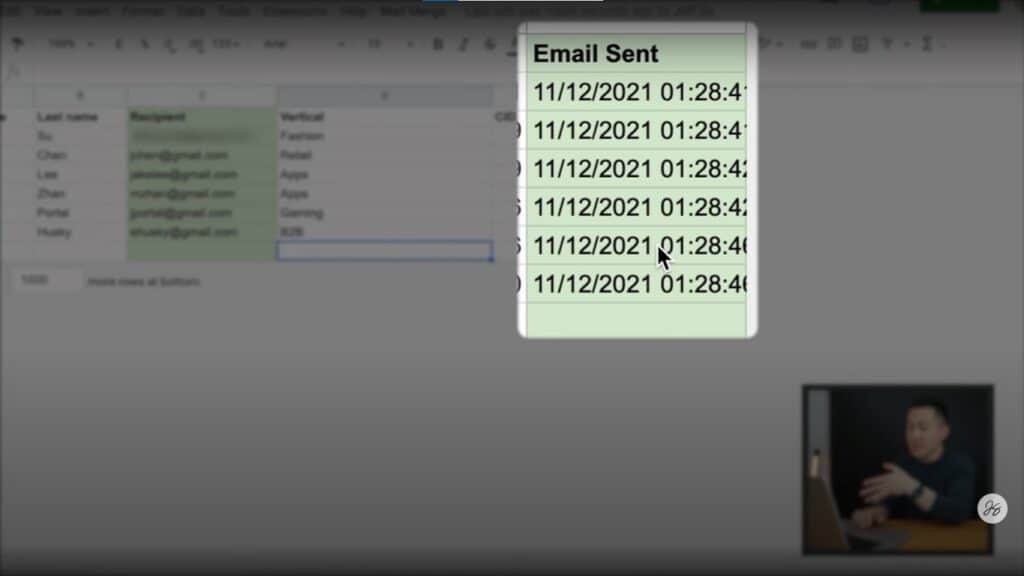
Note: All the headings in the 1st Row can be customised except Recipient and Email Sent. The “Recipient” column is for the mails of recipients. The “Email Sent” column will be updated with the time when you send an email. To remember, you can change their background colour to red.
Send Mail using Mail Merge
After setting up Mail Merge, we are ready to send our email. Let’s see how to do it.
- Open Gmail.
- Click on Compose on the left menu
- Write a mail like you normally would
- In the recipient box, type {{Recipient}} (with curly braces)
- In the subject & body of the mail, you can use all the properties you’ve made as columns in Mail Merge.
- Here is how an email looks like

- After writing an email, go back to Mail Merge
- Click on “Mail Merge” and “Send Emails” from the top menu

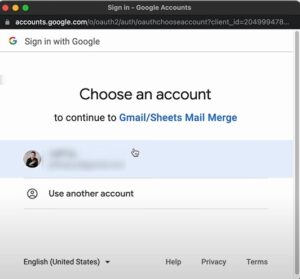
- Click on “Continue” on the Autorisation pop-up, and choose your Gmail Account
- If Google asks for Security Check
- Click on “Advanced”
- Scroll down and click on “Go to Gmail” >> “Allow”
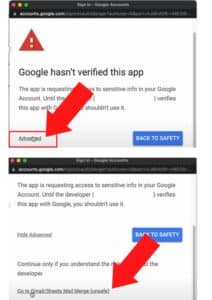
- Don’t worry, Mail Merge is an official app from Google Developers. You can find Mail Merge even on Google’s official websites.
- Go to Gmail and copy the subject line of your email that you wrote earlier
- Come back to Mail Merge Dashboard and click on “Send Emails” again
- In the pop-up box, paste the subject line
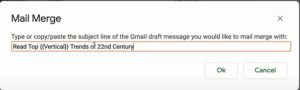
- Click “Ok”
- In a few seconds, the emails will be sent and you will see the “Email Sent” column with the time of the email sent.


Share with your friends 🙂

